Locking Your Virtual Machine's Front Door

Goal
The goal of this post is to add the SSH public key we created in Secure Shell Key Generation to the virtual machine we created in Baby's First Google Compute Instance. Think of this as installing the lock on our new house.
Steps
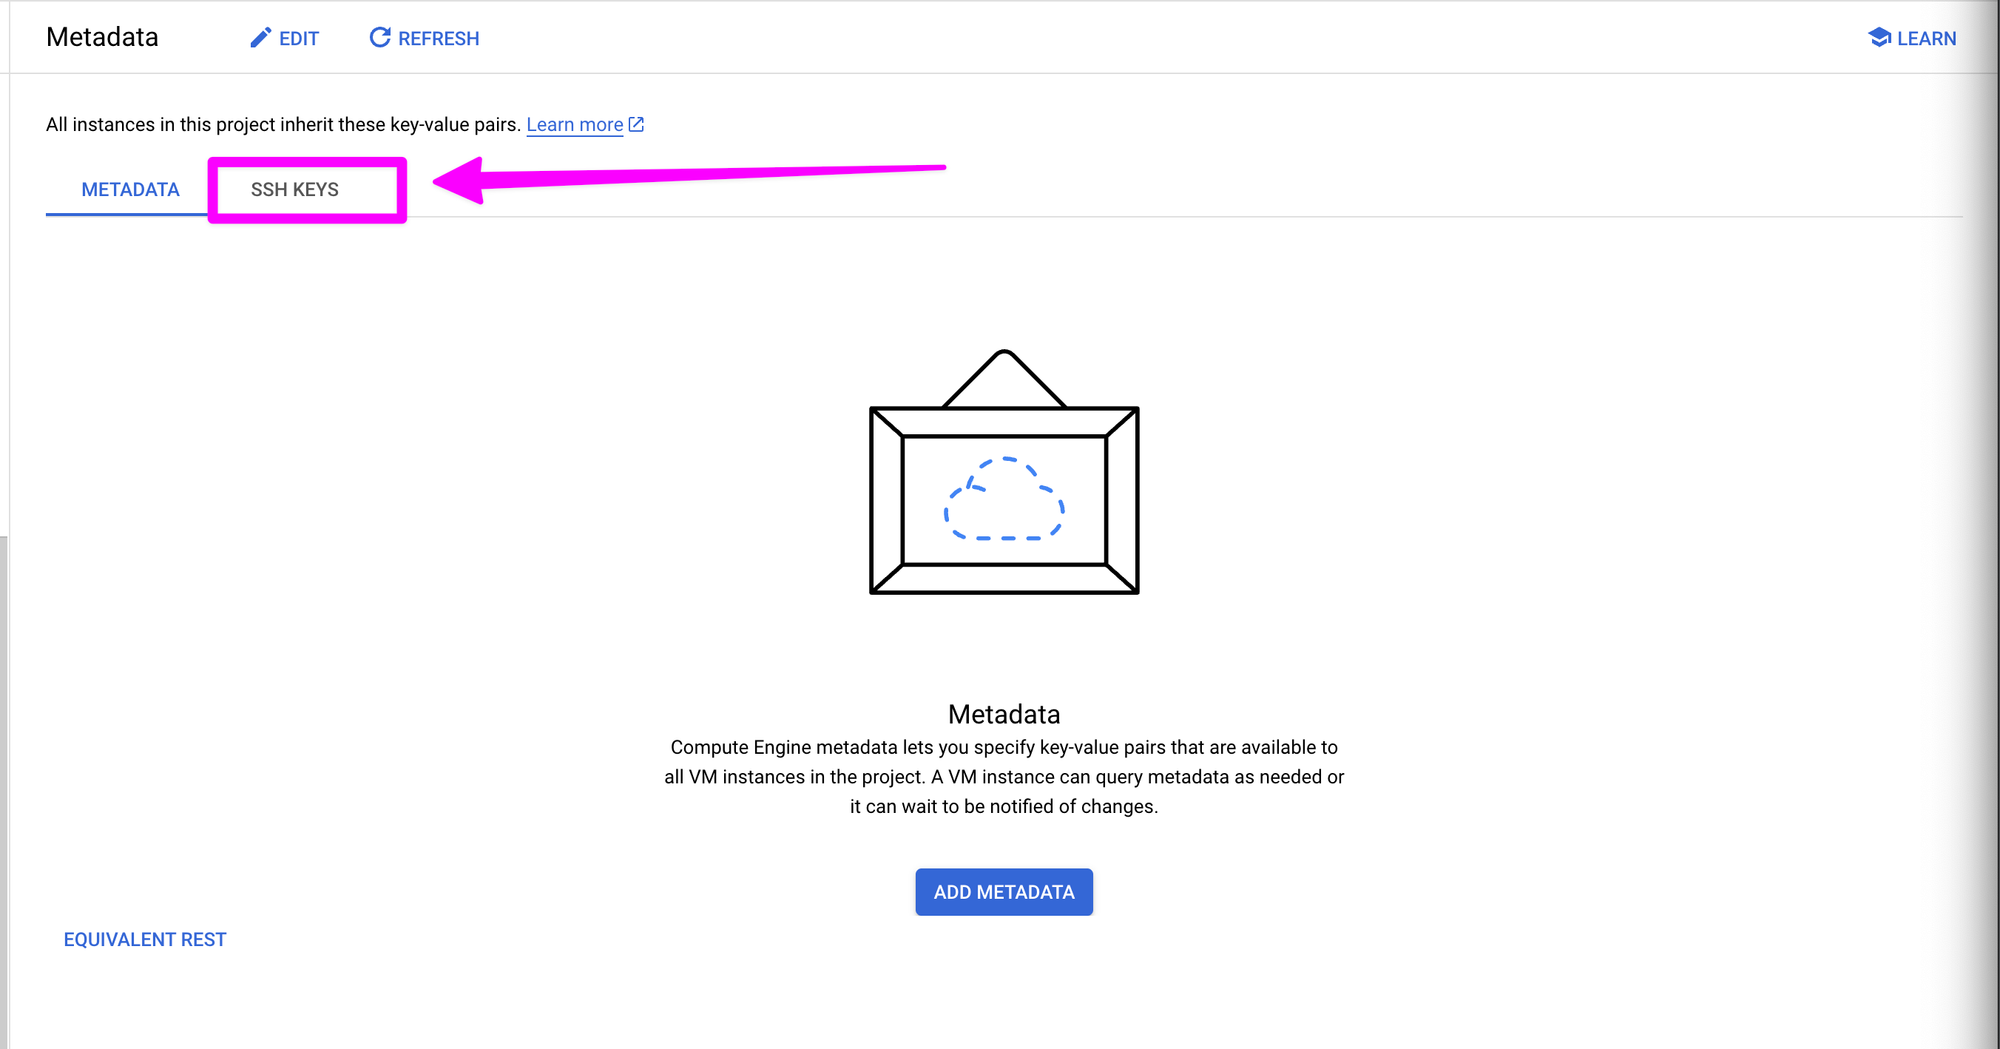
To add the SSH key to our VM, go to the "Metadata" link under "Settings."

Click on "SSH KEYS."

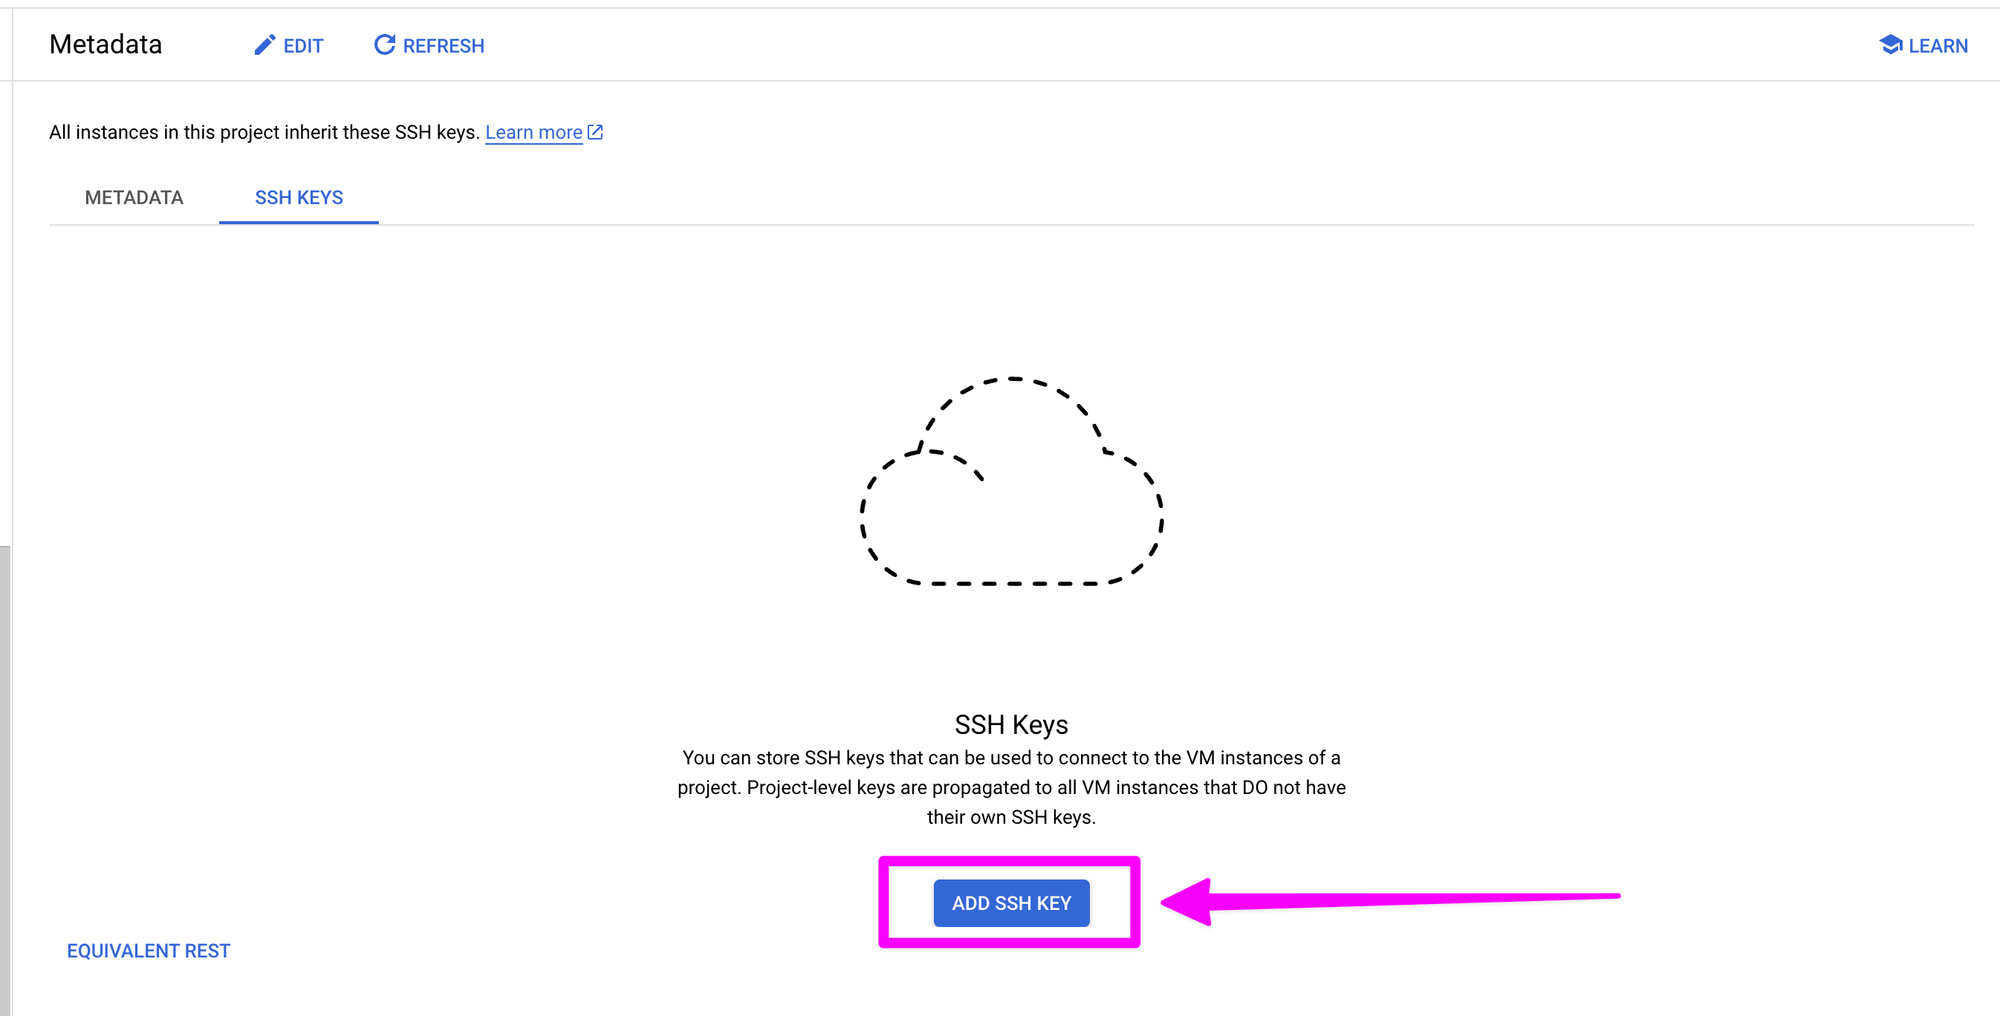
Click "ADD SSH KEY."

Back in terminal, run cat ~/.ssh/project-1.pub.
cat is a command line that will concatenate and print files. More simply, this command will output the contents of the public key into your terminal.
❯ cat ~/.ssh/project-1.pub
ssh-rsa AAAAB....asU= jesse@Jesses-Mac-Studio.local
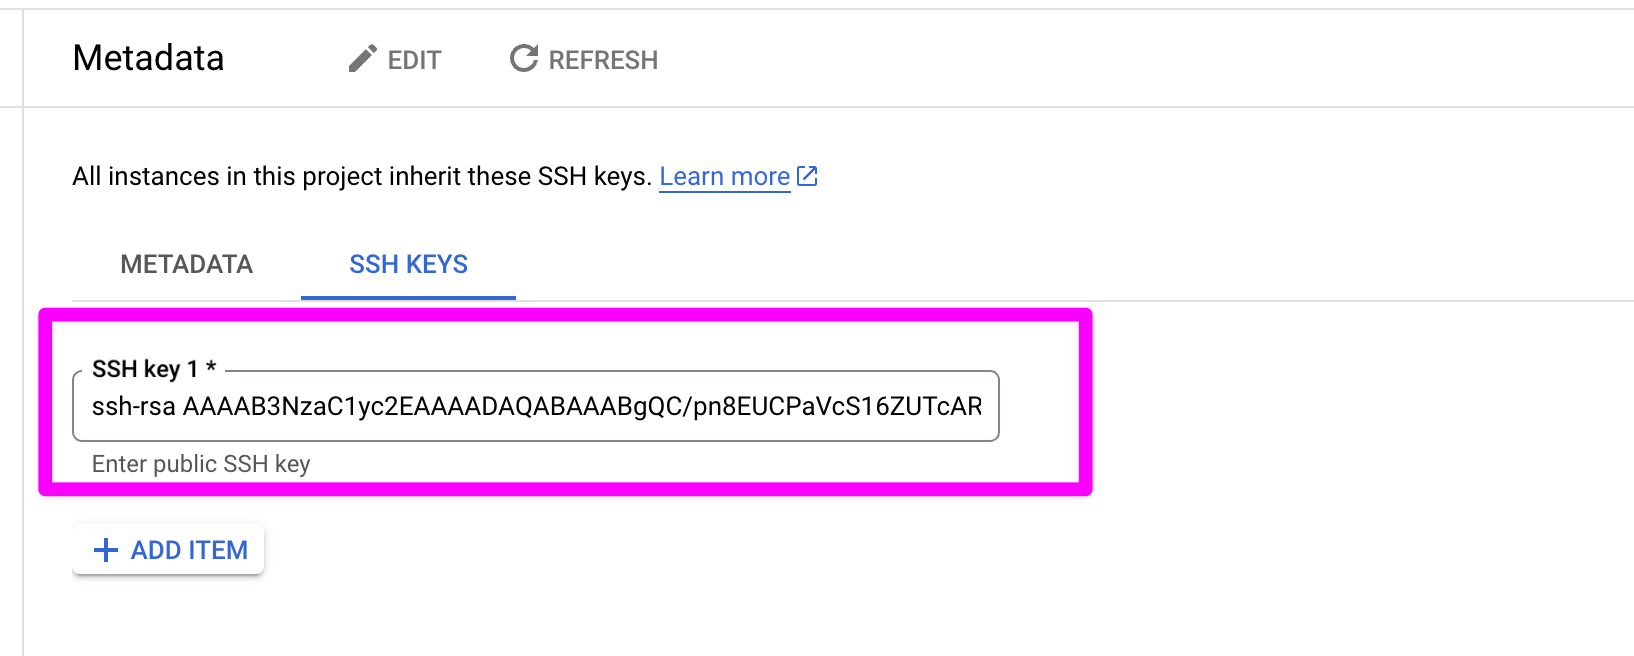
Copy the output (starting with ssh-rsa and ending with the username - in this case jesse@Jesses-Mac-Studio.local) and paste it into the GCP dashboard.

If your output starts with --—BEGIN OPENSSH PRIVATE KEY----- you have run cat on your private key instead of your public key. Double check that the file name you pass to the cat command has a pub file extension.
Click "SAVE." This installs a lock on the door of the VM. The lock can be unlocked with the private key stored in ~/.ssh/project-1.

You should now see the record that you added your SSH key.

Click on "VM instances".

Back in the "VM instances" dashboard, note the External IP of the new instance. To continue the metaphor, this is the street address of the house onto which the lock was just installed. We will need the External IP address for later steps in this series.

It is now time to access the VM from terminal. In terminal run ssh -i <path to private key> <username>@<remote ip>. For example, ssh -i ~/.ssh/project-1 jesse@34.59.150.161.
Since this is the first connection from the local machine to the virtual machine, there will be a prompt to add the new server to the list of known hosts.
❯ ssh -i ~/.ssh/project-1 jesse@34.59.150.161
The authenticity of host '34.59.150.161 (34.59.150.161)' can't be established.
ED25519 key fingerprint is SHA256:W20q...m4.
This key is not known by any other names.
Are you sure you want to continue connecting (yes/no/[fingerprint])?
This is a security feature to protect against "man-in-the-middle" attacks. It is safe to type "yes" and press Enter. This will add the new virtual machine to the list of known hosts.
Are you sure you want to continue connecting (yes/no/[fingerprint])? yes
Warning: Permanently added '34.59.150.161' (ED25519) to the list of known hosts.
Linux instance-1 6.1.0-28-cloud-amd64 #1 SMP PREEMPT_DYNAMIC Debian 6.1.119-1 (2024-11-22) x86_64

The programs included with the Debian GNU/Linux system are free software;
the exact distribution terms for each program are described in the
individual files in /usr/share/doc/*/copyright.

Debian GNU/Linux comes with ABSOLUTELY NO WARRANTY, to the extent
permitted by applicable law.
jesse@instance-1:~$
Now it is possible to run unix commands, like pwd:
jesse@instance-1:~$ pwd
/home/jesse
As well as, echo "hello world!":
jesse@instance-1:~$ echo "hello world!"
hello world!
Conclusion
We can now SSH onto our virtual machine. This is the main prerequisite for using Kamal to deploy a Rails application. In the next post, Bootstrap the Virtual Machine, we'll install some software on our VM so that it is ready for our Rails deployment.
Member discussion