Domain Name Setup

Goal
The goal of this post is to setup the proper DNS configuration so that a human readable URL points to the VM we created in Baby's First Google Compute Instance and that will be running our Rails app from Hello World Rails Speed Run.
I'll be using Cloudflare to show how to set up the DNS records. Most Domain registry services that I've used have similar interfaces, so even if you are not using Cloudflare this hopefully will give you the information you need.
Steps
Before starting I purchased a domain using Cloudflare, railsdeploymentformeremortals.com.
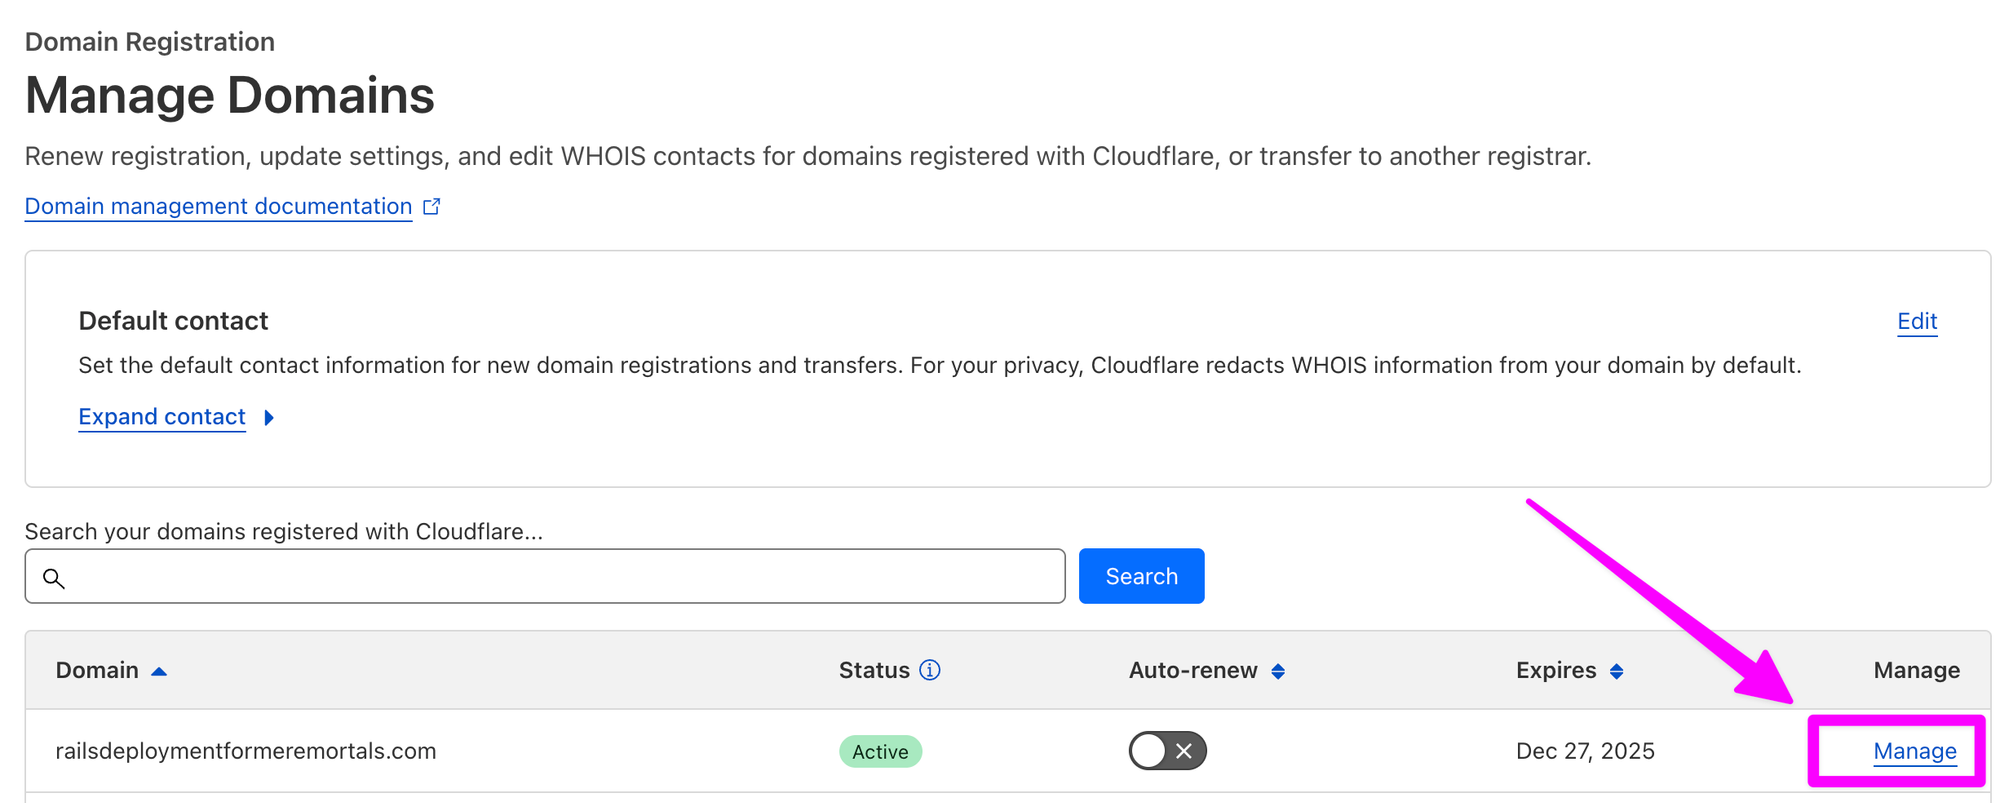
From the "Manage Domains" screen in Cloudflare, click the "Manage" link for the Domain you would like to deploy to.
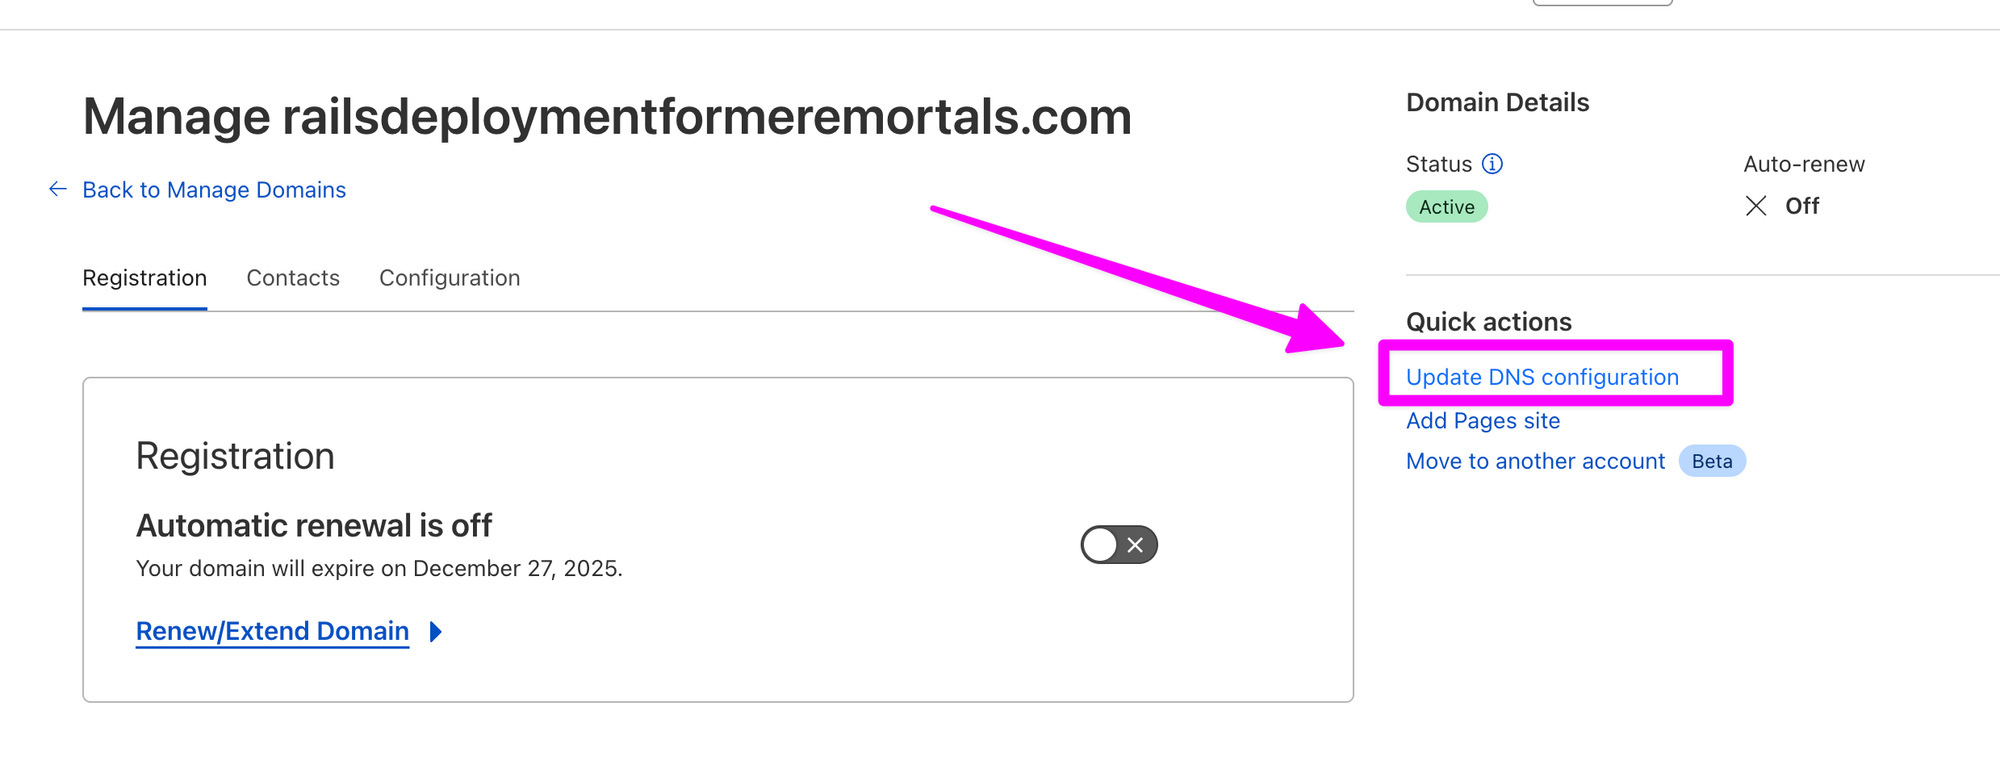
Click "Update DNS configuration"
We'll want to create two records. Click "Add record"

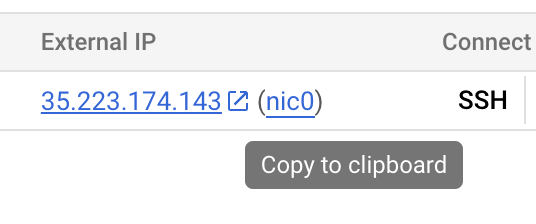
Check Google Cloud Console for your VM's External IP.

Hover over the ip address. Click "Copy to clipboard"
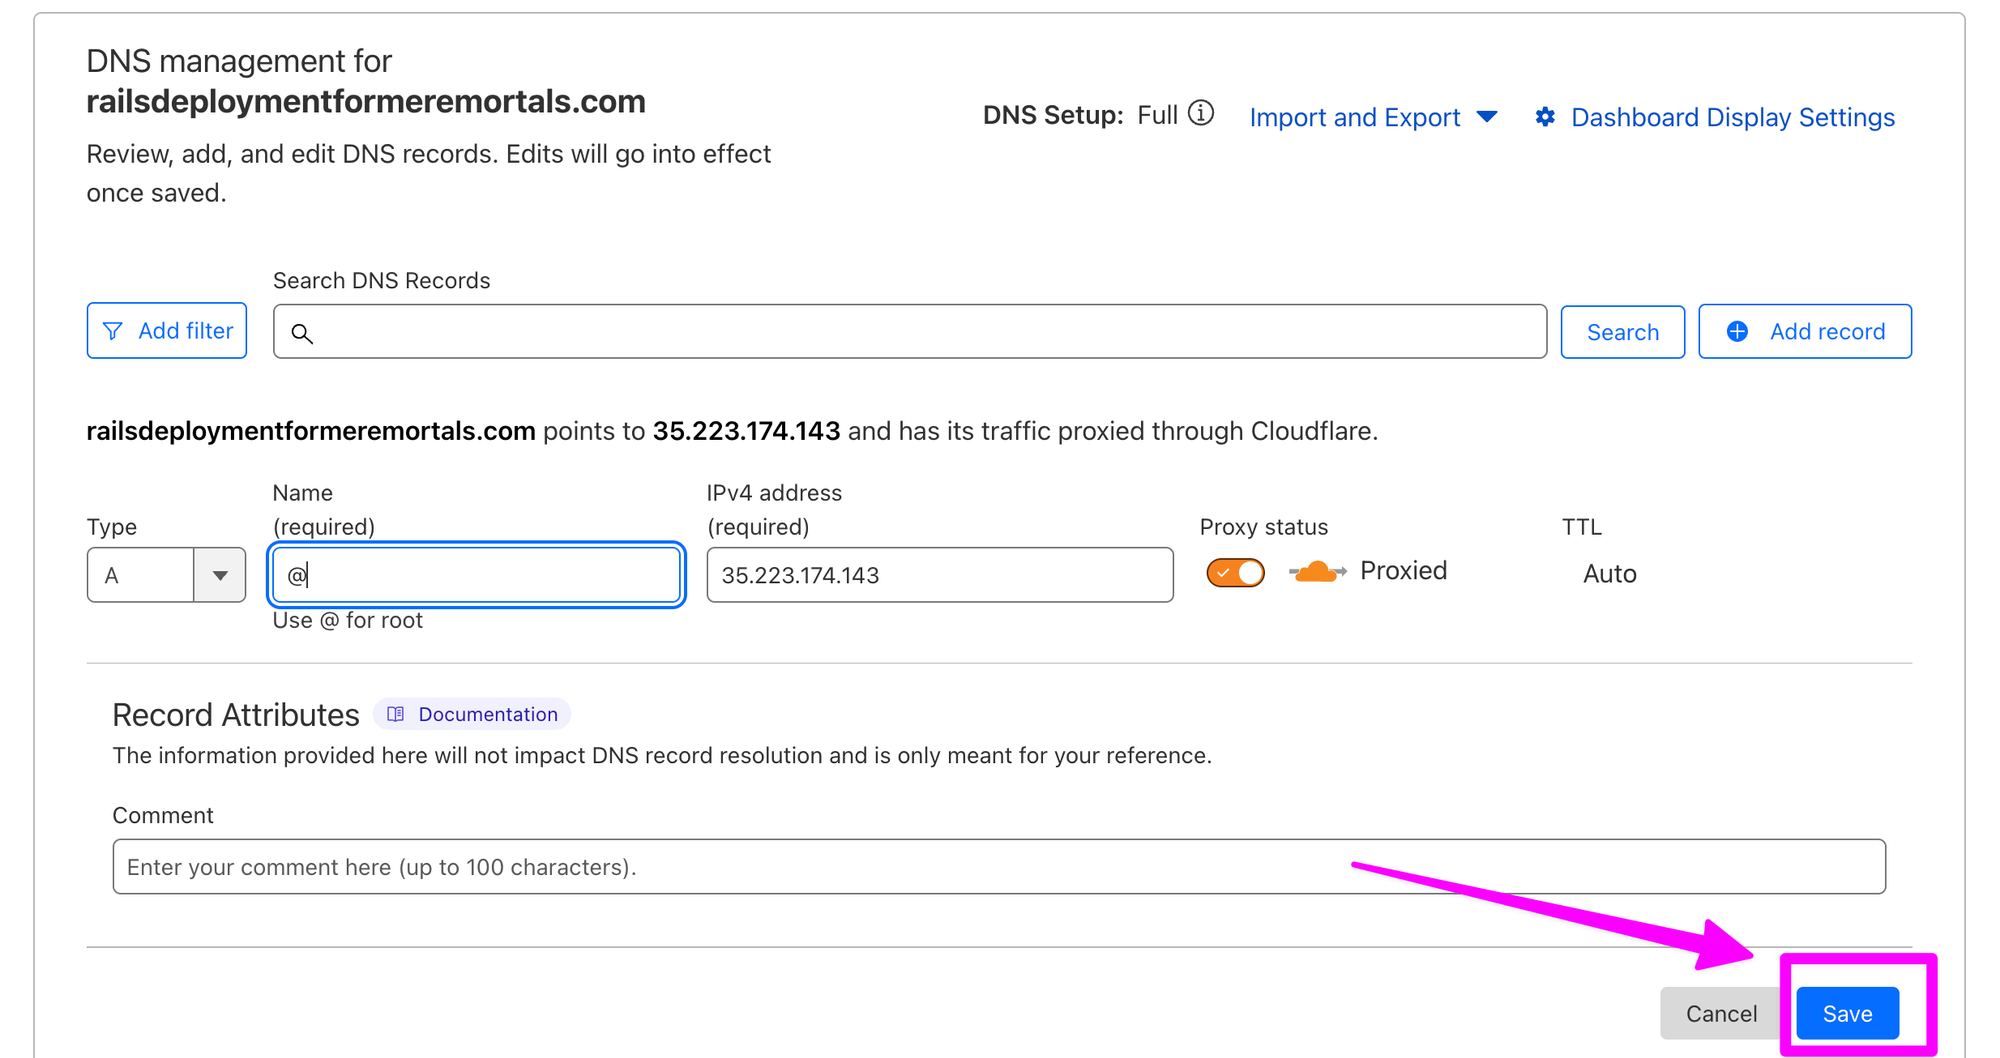
Back in Cloudflare, create an "A" type DNS record for root, which in my case will be railsdeploymentformeremortals.com. Use @ for the name. Paste the External IP address of our GCP VM.

Click "Save"
Create a "CNAME" type record for www.
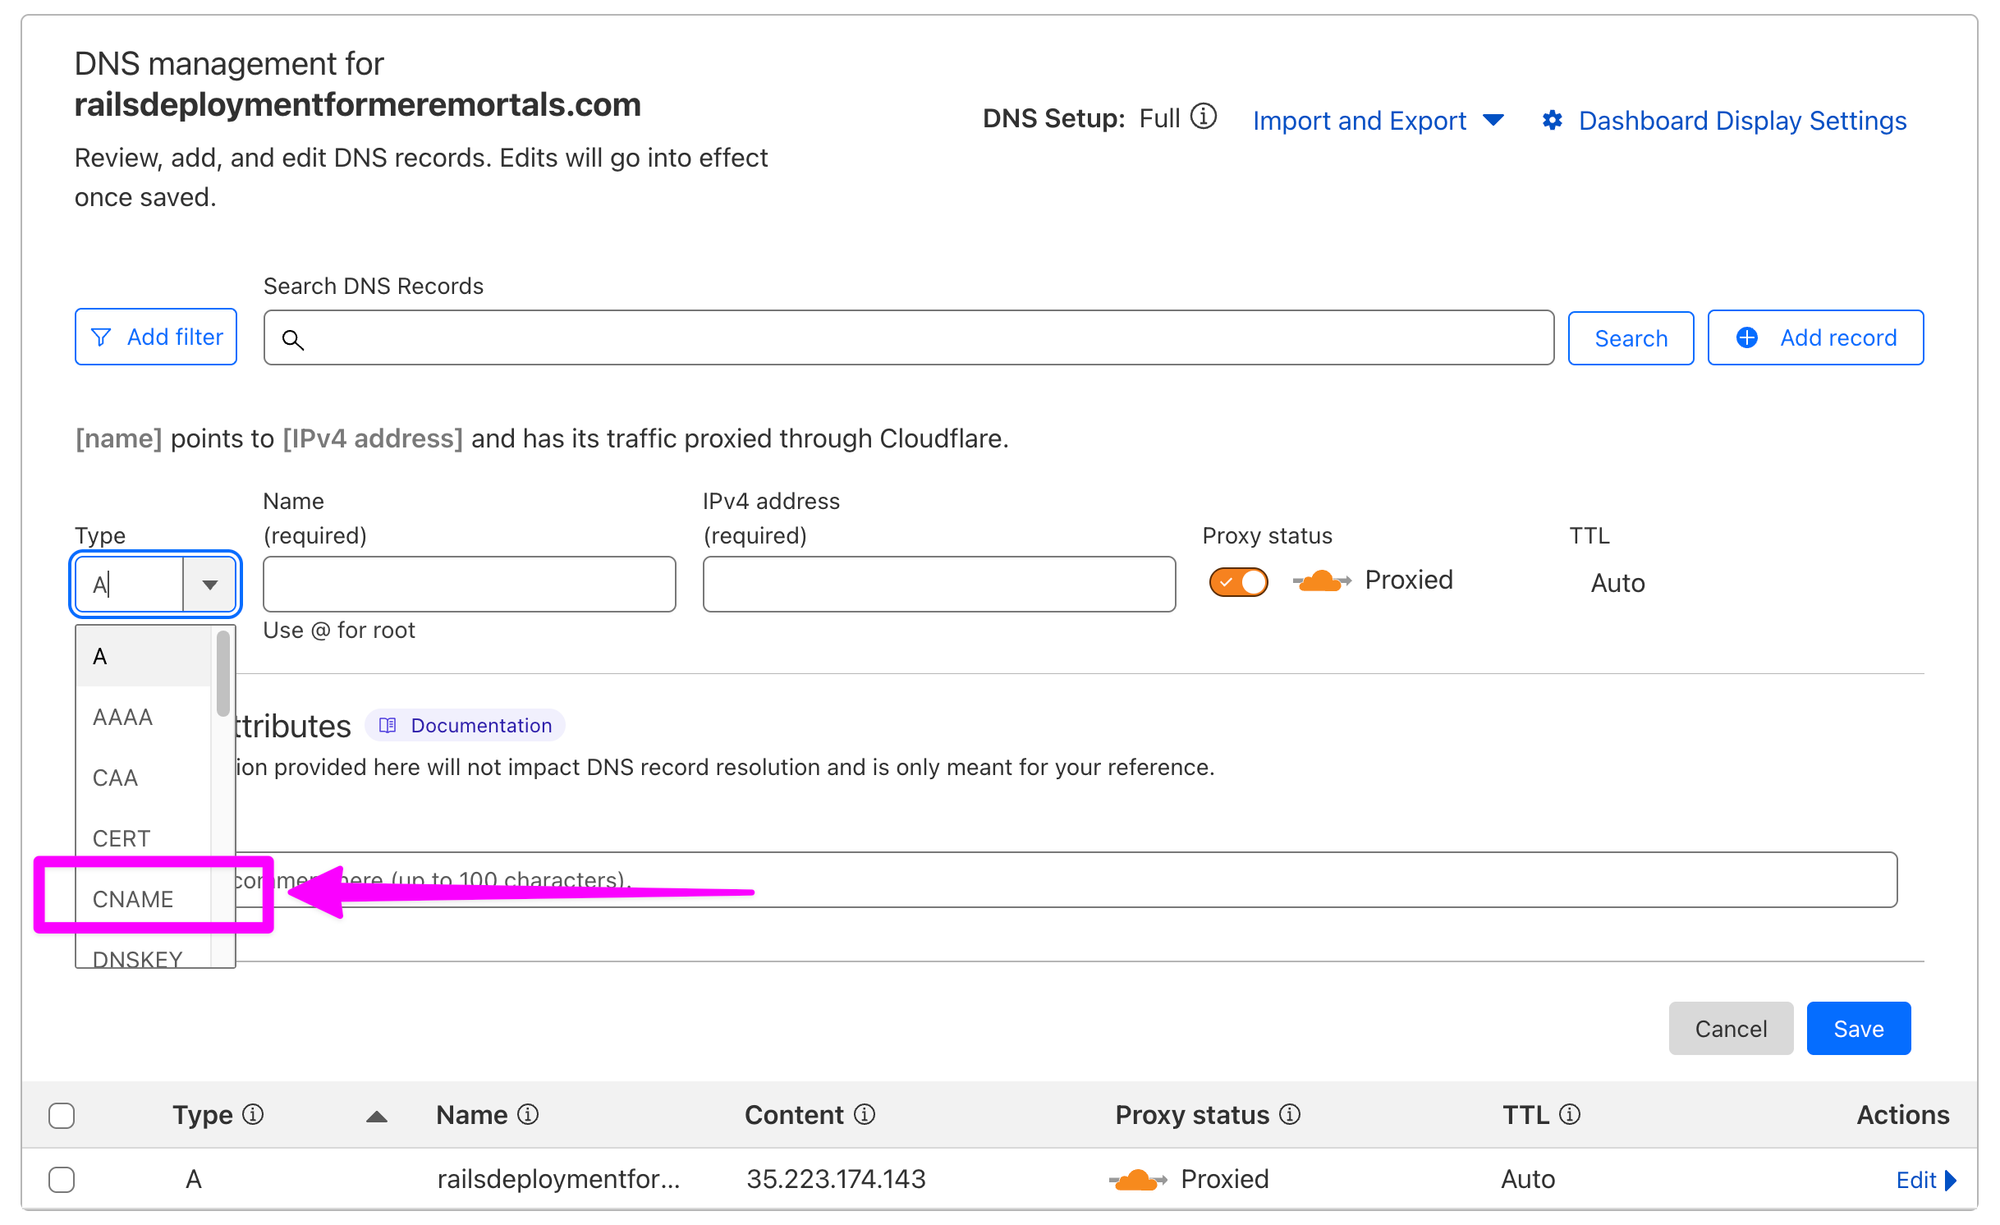
For Name enter www and for Target put your domain name.
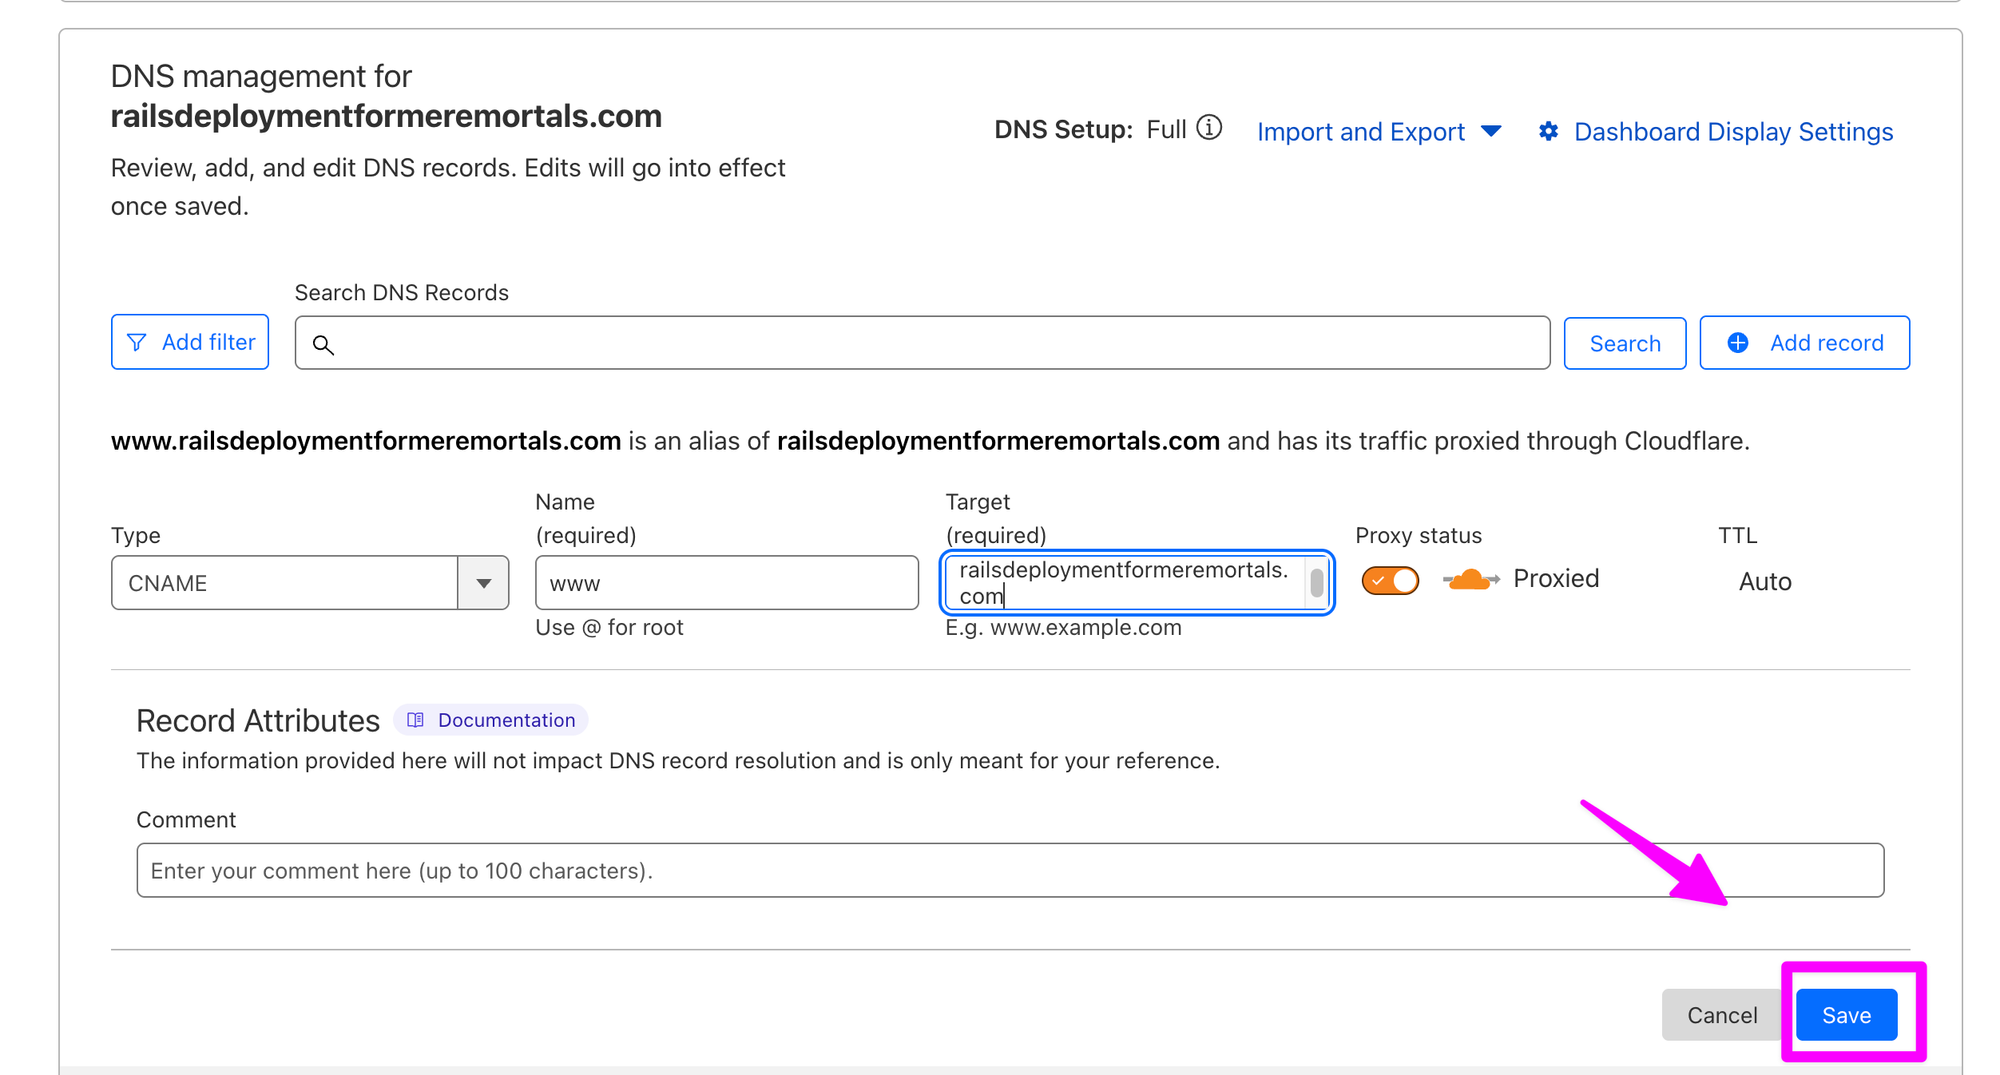
In my case this will direct traffic from www.railsdeploymentformeremortals.com to the VM.
If you are using Cloudflare, Kamal has a call out to enable SSL/TLS to "Full".
Click "SSL/TSL"

Click "Configure"

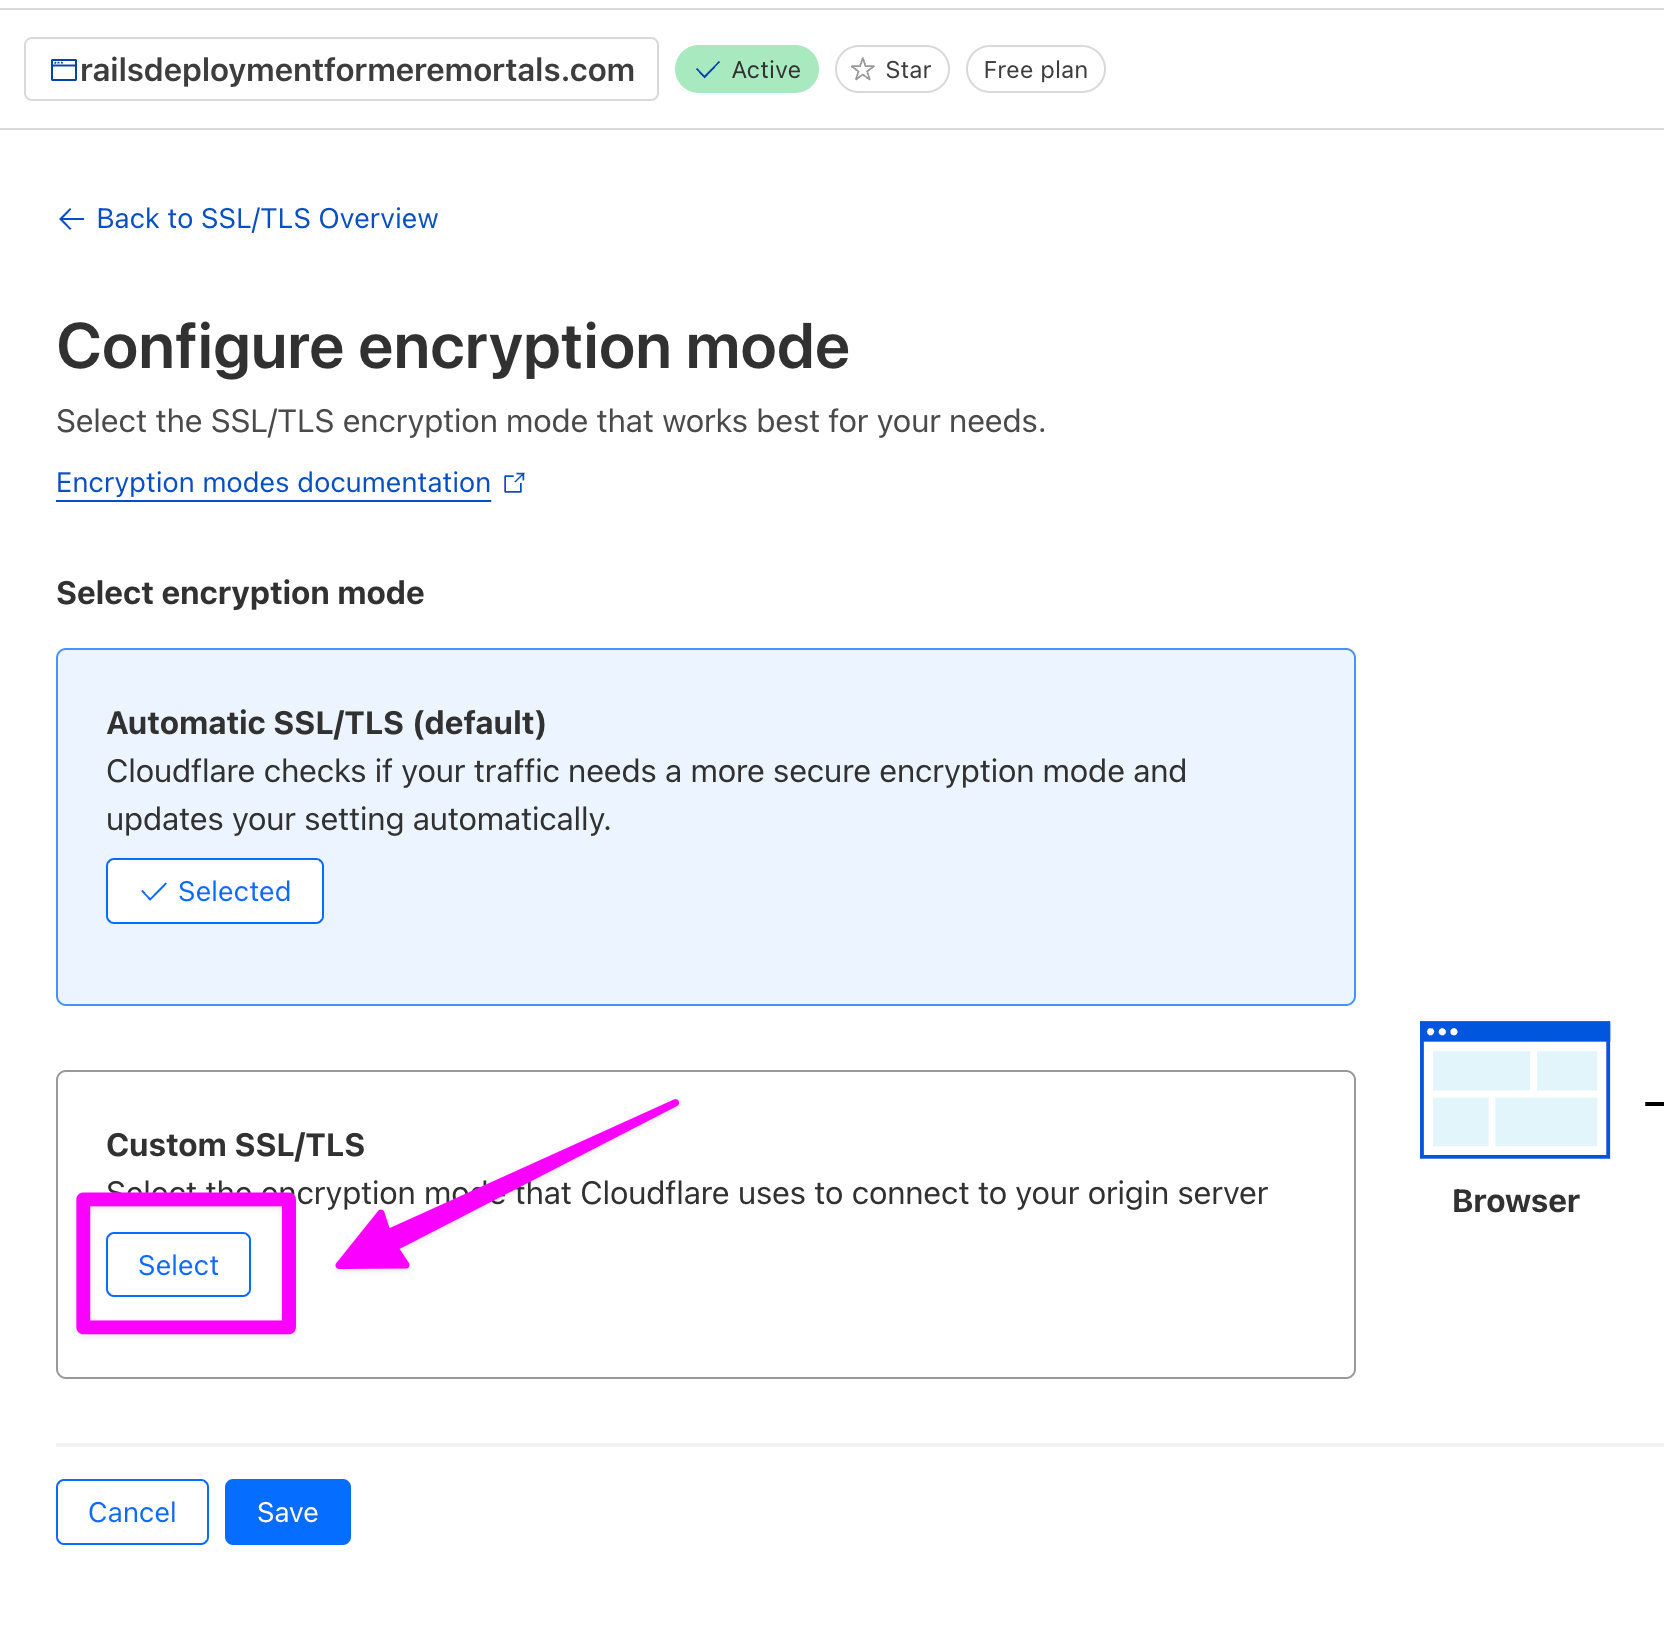
Click "Select" under Custom SSL/TLS.
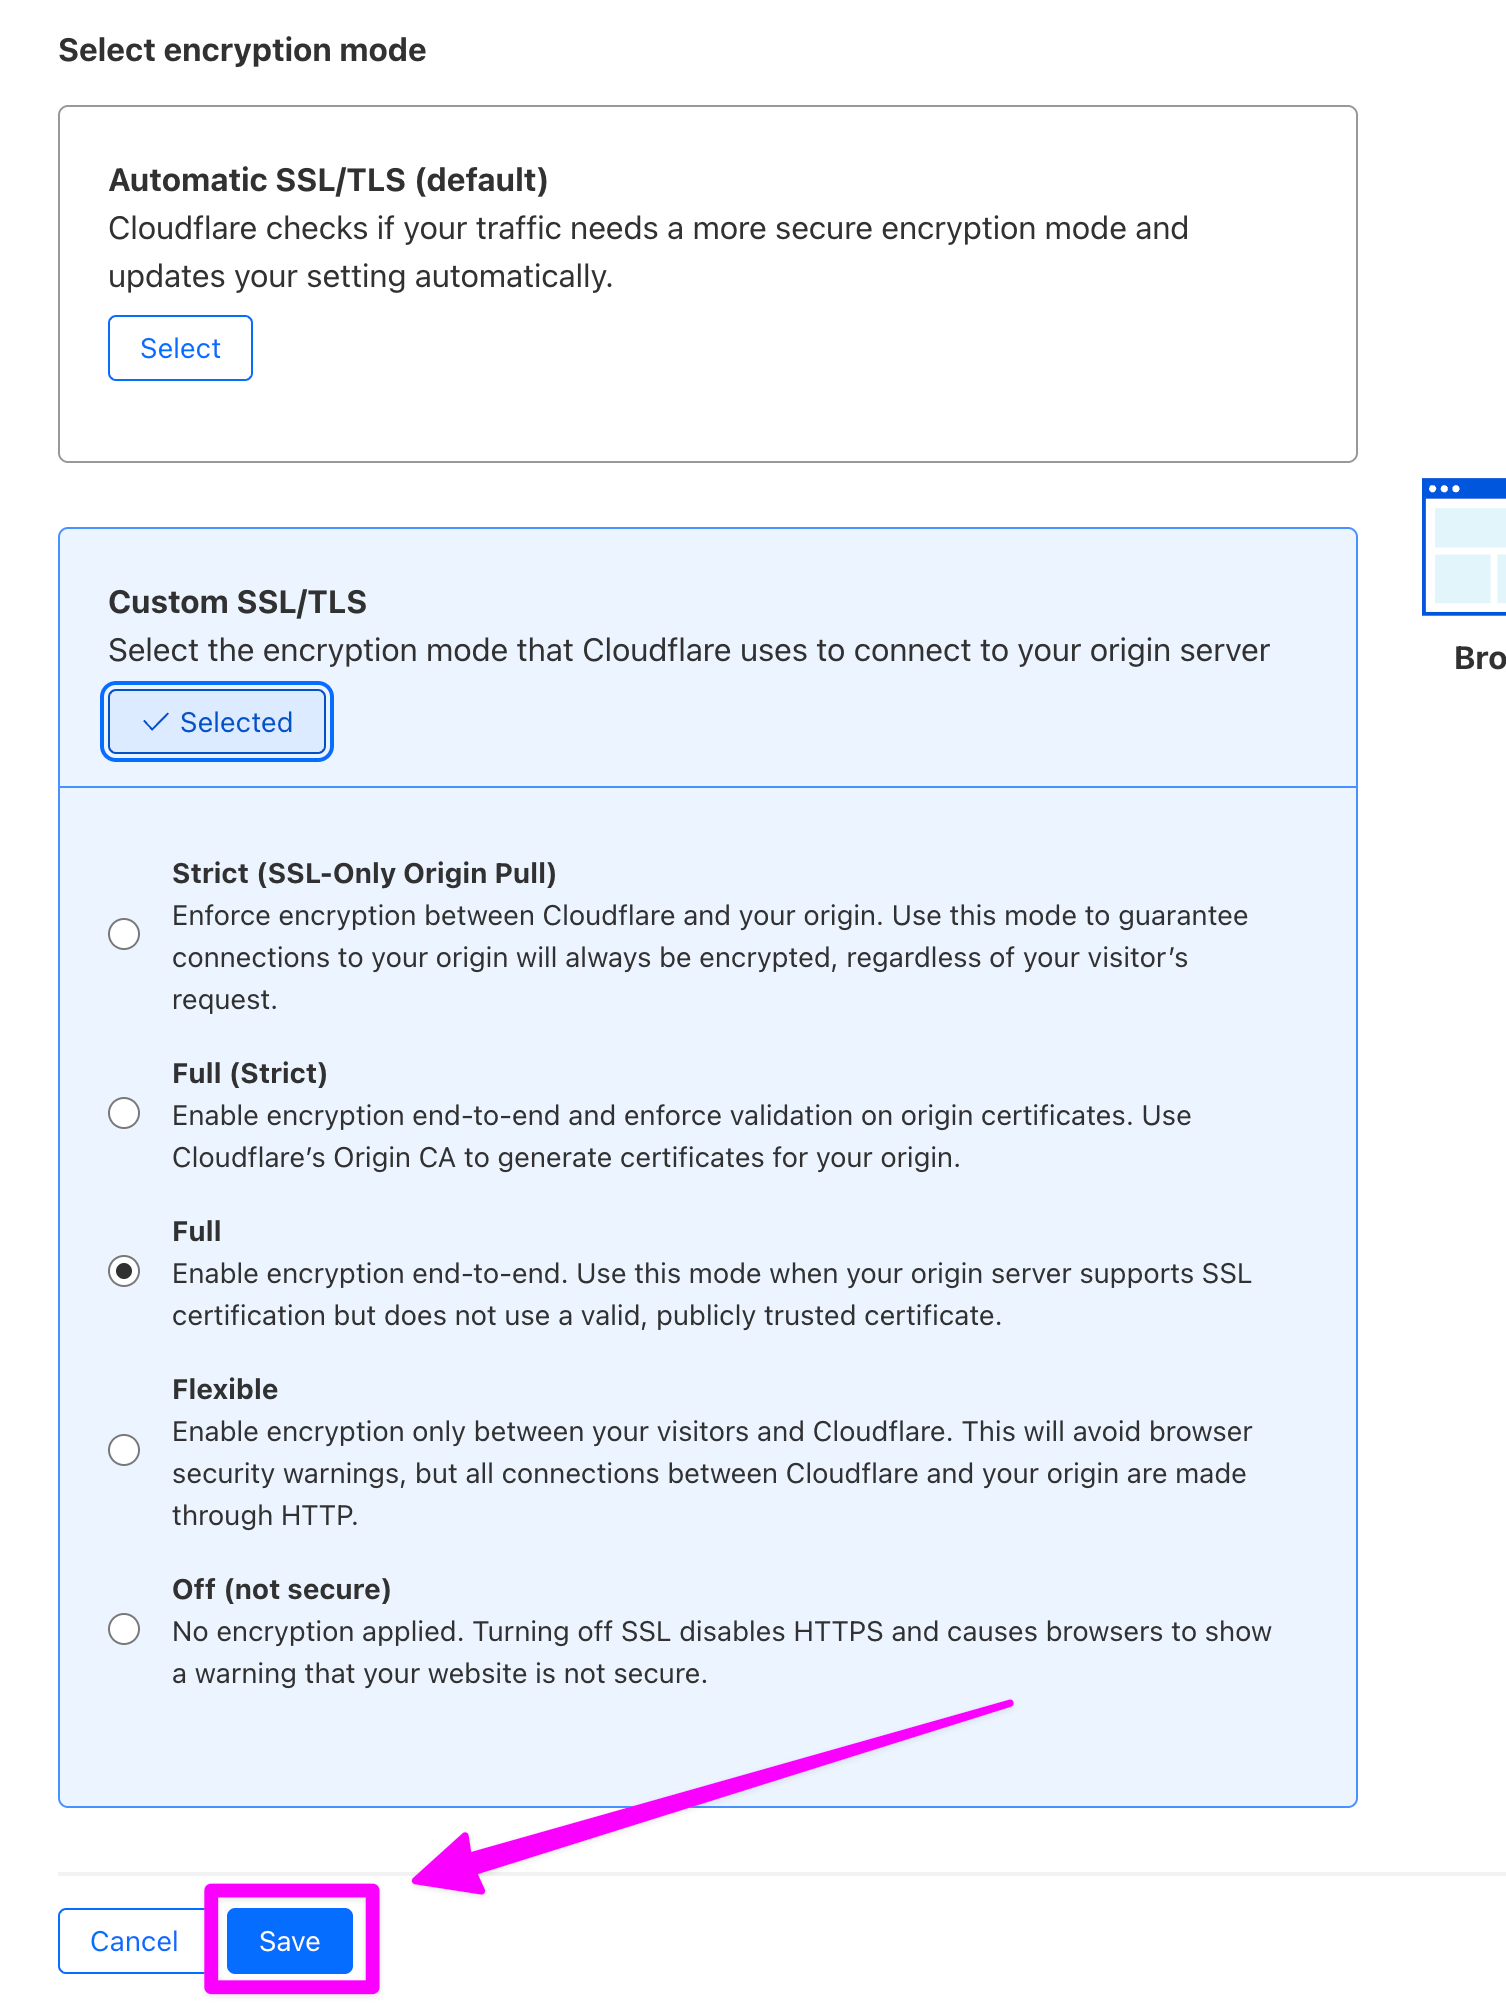
Select "Full"

Click "Save"
Conclusion
We now have a domain pointing to our VM. It's time for Deploying Without Tears.
Member discussion